
30 Second Video: Plan a Seedance 2.5 Anime Scene

Cross-posted from the MkAnime blog. I build and write for MkAnime; this is one of a series of Seedance 2.5 workflow guides.
A 30 second video gives an anime idea enough room to develop, but it also gives continuity mistakes more time to appear. Before generating with Seedance 2.5, turn the idea into visible beats, decide what must stay fixed, and design an ending the scene can actually reach.
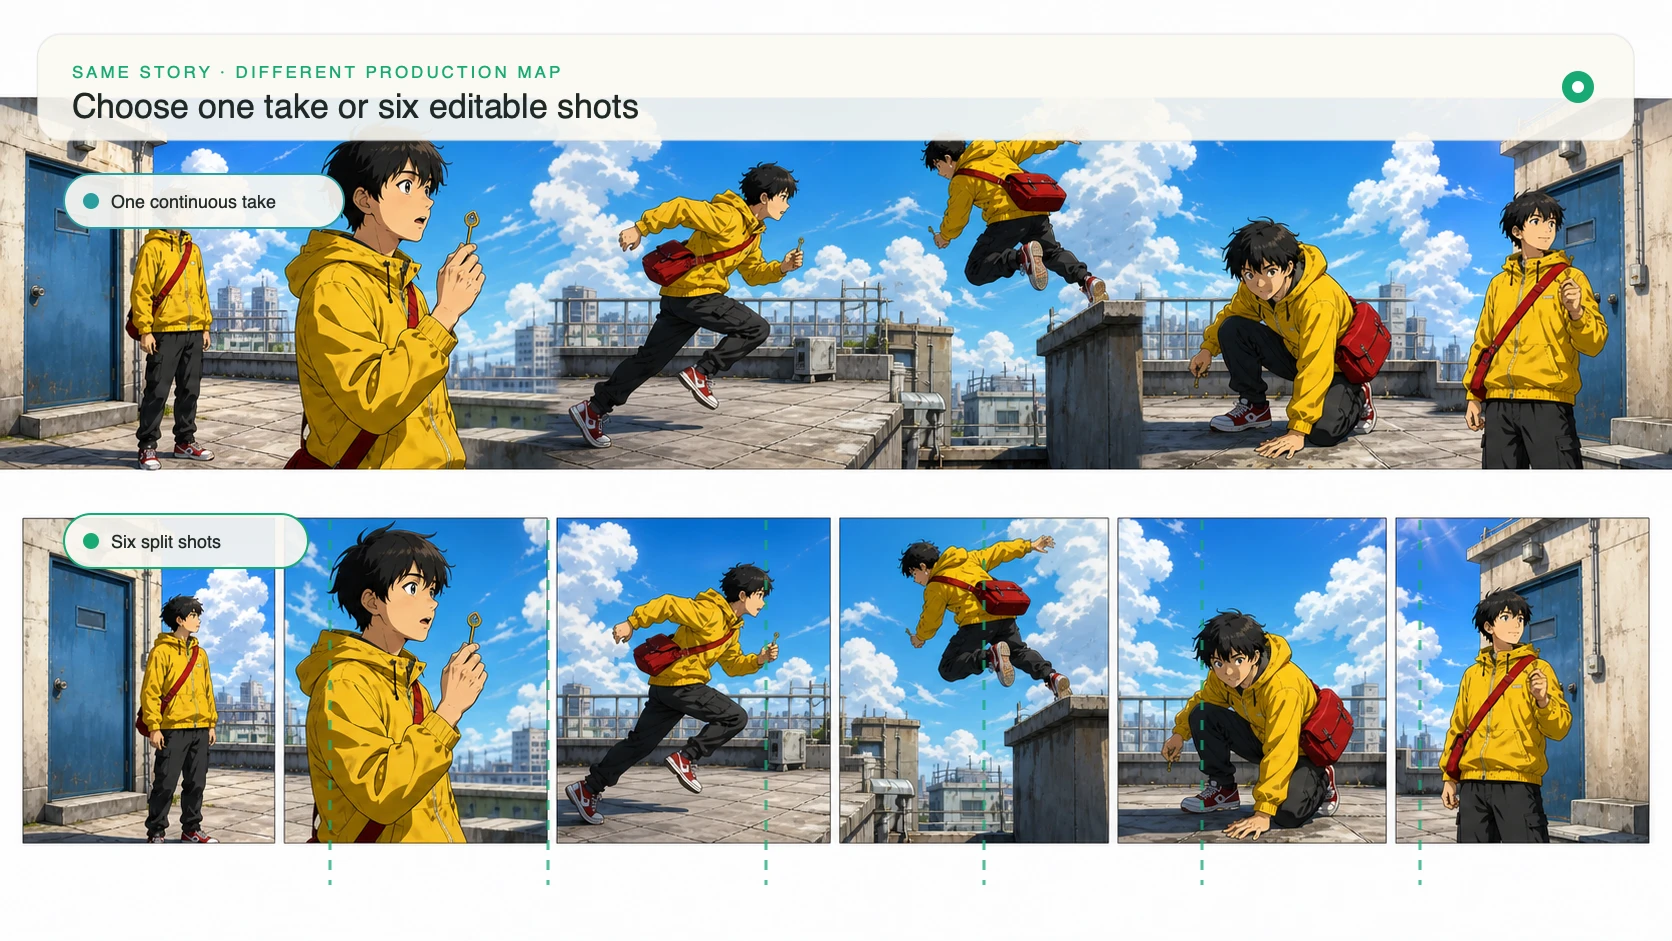
This workflow is for planning one continuous scene. It is not a claim that every idea should be generated as one take; the final section explains when separate storyboard shots are the more controllable choice.
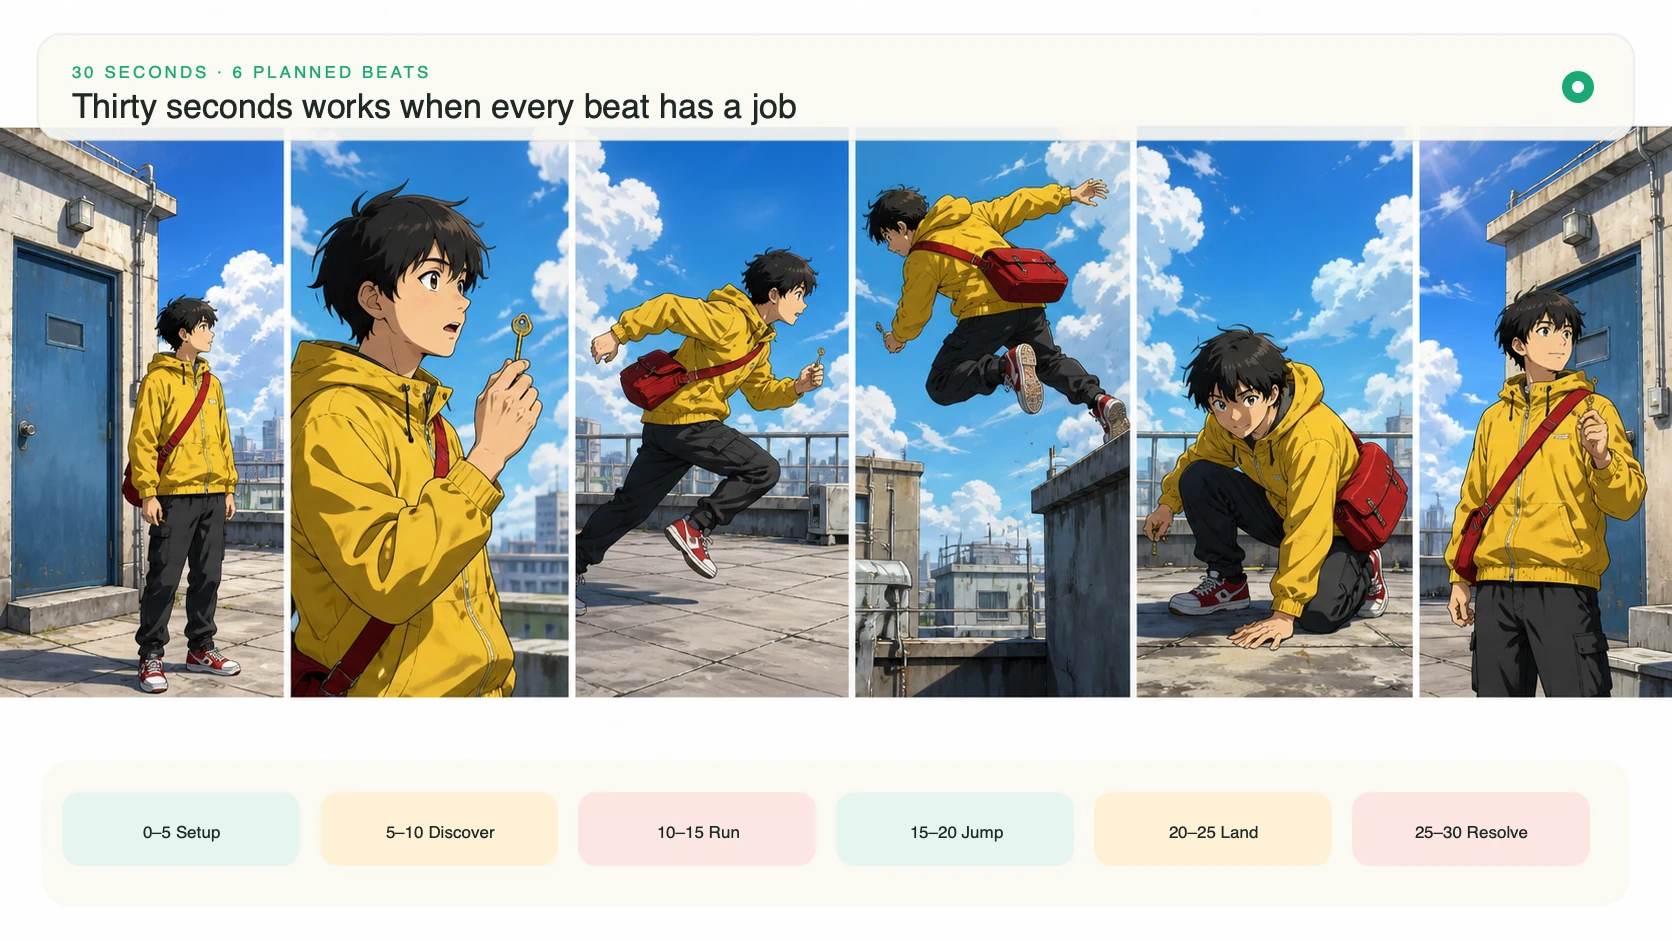
Decide Whether the Idea Needs One Take
One take works when every beat happens in a connected place and the camera can observe the progression without teleporting. A character hears a signal, crosses a rooftop, reaches a door, hesitates, and opens it: the action has one spatial line and one emotional turn.
Do not force a one-take scene when the idea requires several locations, costume changes, large time jumps, or unrelated camera positions. Those are editorial cuts disguised as prompt instructions. A long prompt cannot make them physically continuous simply by adding "then."
Use this test: sketch the camera path as one unbroken line. If the line must jump across space or time, plan separate shots. If it can move, hold, or reframe through the scene, a 30-second generation may be worth testing.
Map the Story Into 0-30 Second Beats
Divide the scene by changes the viewer can see, not by sentences in the script. Each beat should alter action, information, emotion, or composition.
| Time | Story job | Visible event | Checkpoint |
|---|---|---|---|
| 0-5s | Establish | Character and goal are readable | Viewer knows where to look |
| 5-10s | Trigger | A signal or obstacle changes the situation | Cause of the next action is visible |
| 10-17s | Action | Character responds and crosses space | Motion direction remains coherent |
| 17-23s | Complication | A second event forces a choice | Scene escalates without changing location |
| 23-27s | Decision | Character completes the key action | Camera prepares the ending |
| 27-30s | Resolve | Motion settles on the final composition | No new story information appears |
The ranges are planning guides, not frame-accurate promises. Their value is diagnostic: if the output spends twelve seconds establishing the rooftop, the action has too little time because the prompt did not prioritize the trigger.
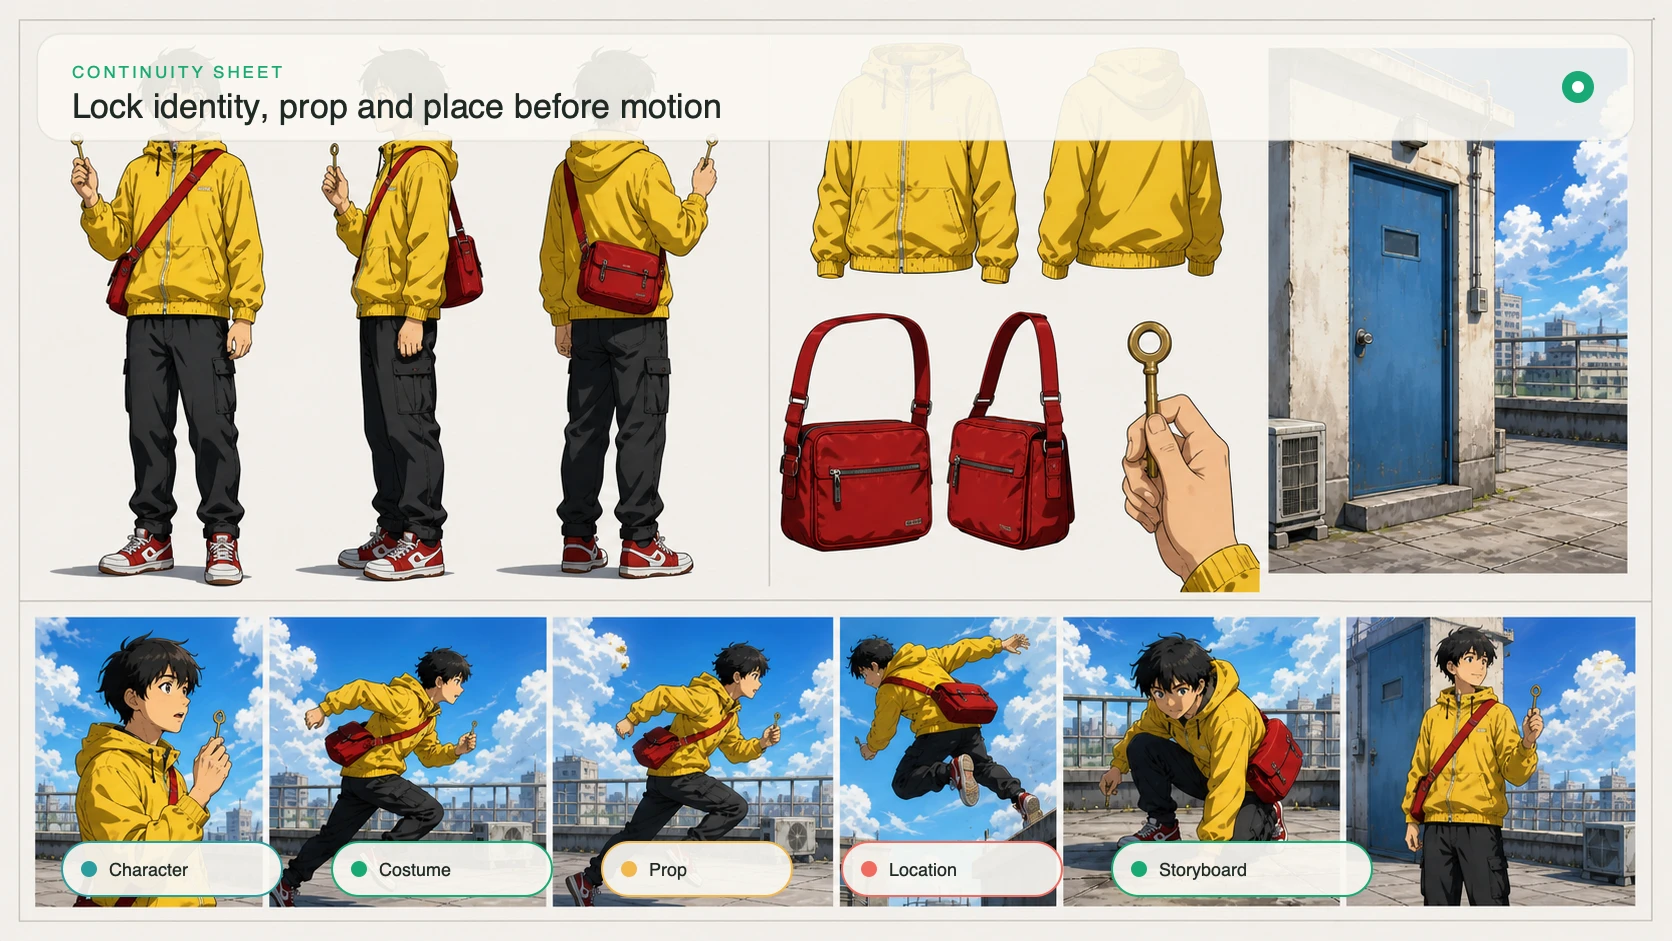
Lock Character, Prop, and Location Anchors
Write a short continuity line before the timeline. Keep only visible facts that would make the scene feel broken if they changed.
For example: "Original teenage courier with short black hair, yellow windbreaker, red canvas satchel worn across the left shoulder; one brass key in the right hand; school rooftop at bright late afternoon; blue utility door at the north wall."
Repeat an anchor only when a later beat makes it vulnerable. If the character turns, specify that the satchel remains on the left shoulder. If the key opens the door, mention that the same brass key stays in the right hand until the lock turns. Do not restate every detail in every beat.
If approved images already define the character or location, the Seedance 2.5 workflow can carry those references inside a MkAnime project. References reduce ambiguity, but they should agree with the written anchors.
Give Each Beat an Action and Camera Role
The action tells the character what changes. The camera tells the viewer how to understand that change. Write both for each major beat, but keep one continuous camera logic across the scene.
A usable progression might be:
- Hold a wide three-quarter view while the courier notices a blinking light near the door.
- Track laterally as they cross the rooftop, keeping the door ahead in the frame.
- Ease into a medium shot when the light shuts off and the character stops.
- Make one slow push-in as the key enters the lock.
- Stop all camera movement on the final close view of the opening door.
This is still one camera journey: establish, follow, narrow, settle. An orbit, overhead cut, handheld shake, crane move, and sudden close-up would ask for several incompatible journeys.
Design Audio Across the Full Scene
Give the scene one continuous sound bed, then place only the events that matter. Rooftop wind and distant traffic can connect all thirty seconds. A radio chirp triggers the action, shoes scrape during the crossing, the key clicks at the decision, and the door hinge resolves the scene.
Keep dialogue short. One line at the complication or decision point is easier to time than a conversation spread across the whole clip. If the character says, "This was never locked," reserve a quiet beat before the line and avoid covering it with a loud music cue.
Sound should confirm visible causality. If the radio chirp makes the character turn, place the chirp before the turn. If a sound has no visible or narrative source, decide whether it adds atmosphere or merely fills space.
Build the Seedance 2.5 Prompt
Combine the plan into one readable production brief:
30-second continuous anime scene. Original teenage courier with short black hair, yellow windbreaker, red canvas satchel on the left shoulder, brass key in the right hand. Bright late-afternoon school rooftop, blue utility door on the north wall, clean contemporary 2D anime linework, luminous sky and readable faces.

0-5s: wide three-quarter view; the courier stands near the stairwell and notices a blinking red light beside the blue door.
5-10s: a radio chirp sounds; the courier turns toward it.
10-17s: the courier crosses the rooftop; track laterally at a stable distance, keeping the door ahead.
17-23s: the light turns off; the courier stops, grips the same brass key, and says quietly, "This was never locked."
23-27s: move into one slow push-in as the key enters the lock and turns.
27-30s: the door opens a few inches into warm white light; all motion settles.

Audio: continuous rooftop wind and distant traffic; radio chirp at the trigger; footsteps during the crossing; clear key click and restrained hinge sound; no music.
Final frame: stable medium close view from behind the courier, red satchel still on the left shoulder, hand on the key, blue door partly open, no new action.
Set 30 seconds in the Seedance 2.5 video generator, choose the delivery ratio, and enable audio only if you want to test the sound plan in the same pass. Read the displayed credit quote before starting.
Review Continuity, Timing, and the Ending
Review in three passes instead of deciding whether the clip "feels good."
First, mute it and check continuity: hair, jacket, satchel side, key hand, door color, and rooftop orientation. Second, watch the timeline: each trigger must precede its response, and no beat should consume the time needed by the next. Third, watch the final three seconds: the camera and character should settle on the promised frame.
Then listen separately. Check whether the radio, steps, line, key, and hinge occur near their visible causes. Record the earliest failure and revise that control first; later problems may be consequences of the same timing drift.
When to Split the Scene Into Separate Shots
Split the scene when continuity cannot survive the amount of change, when one failed beat makes the whole clip unusable, or when you need precise editing control. A six-shot sequence costs more planning, but it lets you regenerate the door close-up without discarding a successful rooftop crossing.
The script-to-anime storyboard workflow explains how to turn story beats into separate, reviewable shots. Use one 30-second scene for discovery when the spatial journey matters; use a storyboard when local revision, pacing, and shot-to-shot continuity matter more.
This post first appeared on the MkAnime blog. AI assistance was used to help draft and organize the article; the steps and product behavior described were checked against the live product.


