
Vertical Video: Seedance 2.5 Anime Shorts Workflow

Cross-posted from the MkAnime blog. I build and write for MkAnime; this is one of a series of Seedance 2.5 workflow guides.
A vertical video is not a horizontal anime shot with the sides removed. When you generate a 9:16 scene with Seedance 2.5, character position, action direction, camera movement, story rhythm, and audio all need to work inside a narrow frame from the start.
This workflow focuses on model-specific staging and review for vertical generation. For the broader process of choosing an idea, building several shots, adding voice, and publishing across platforms, use the existing guide to AI anime shorts.
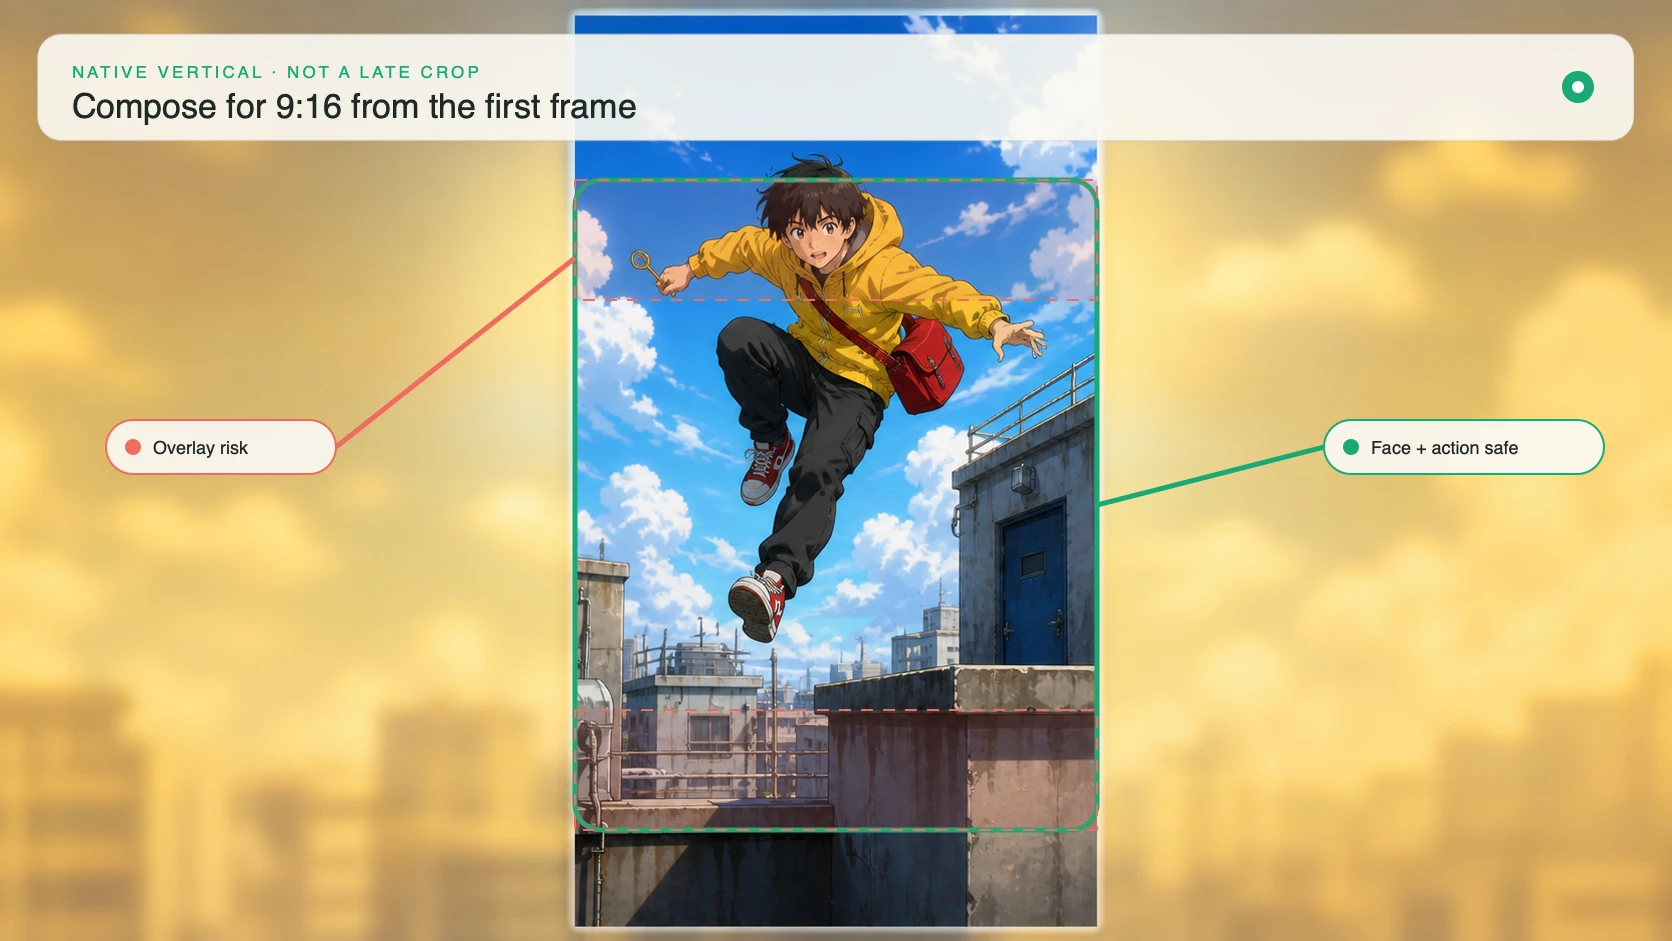
Start With the Publishing Frame, Not a Wide Crop
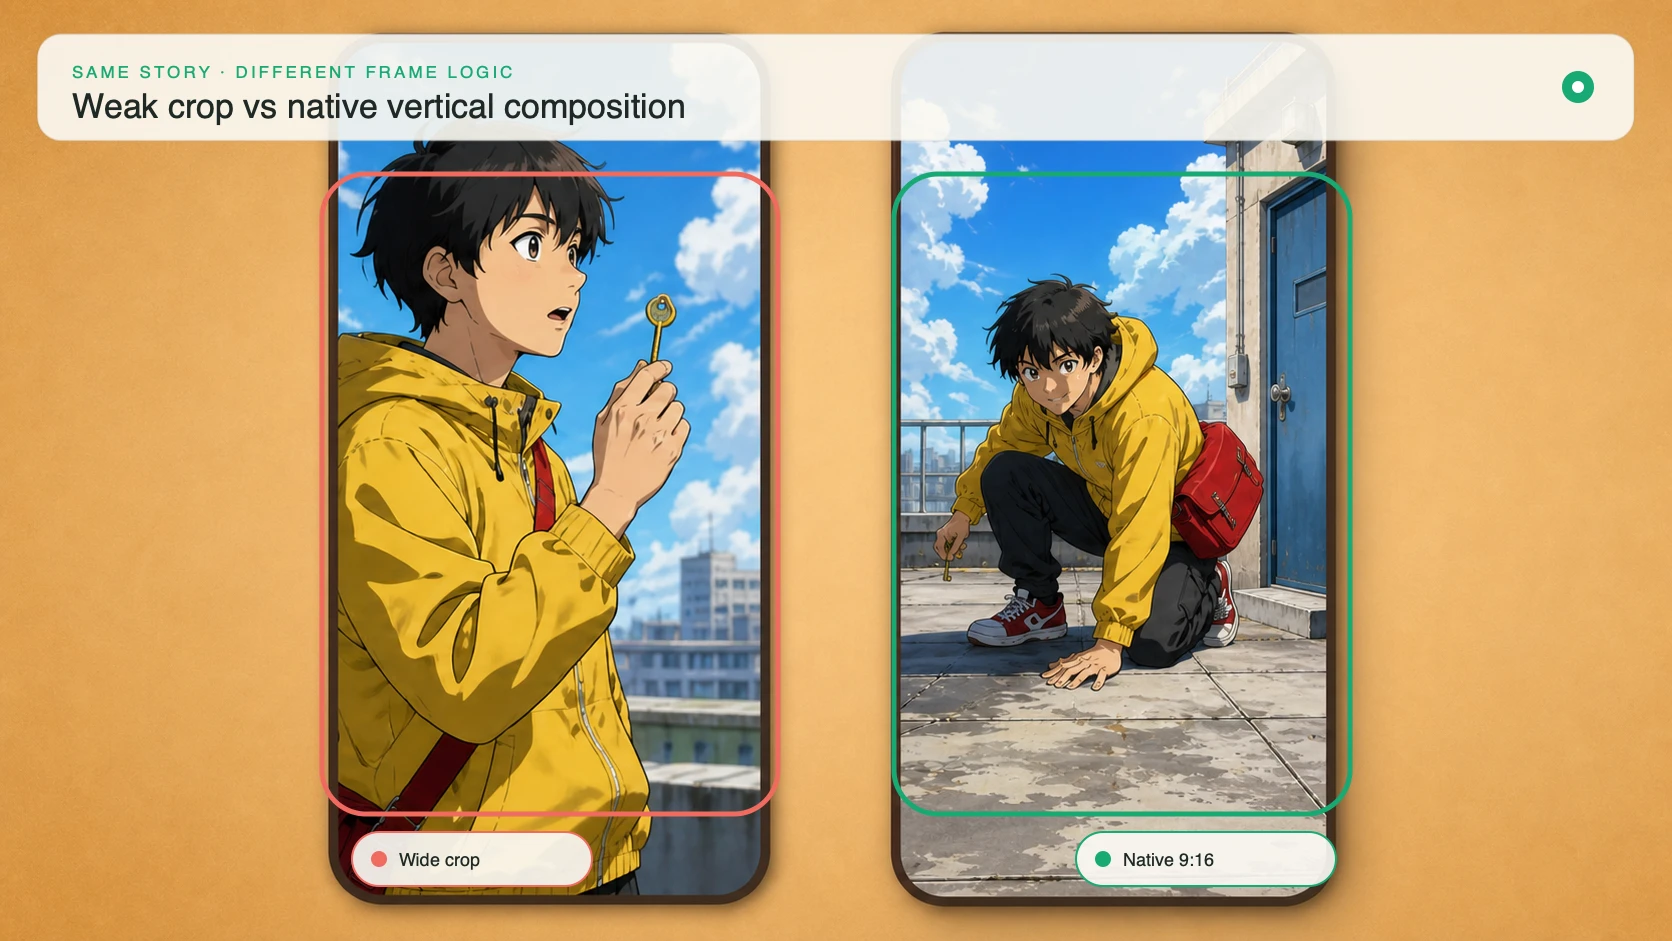
Choose 9:16 before you write the shot. The frame changes what can be shown at once: less horizontal geography, more vertical depth, and less room for two characters to separate sideways.
A wide rooftop chase might place one character on each side and use a lateral track. In 9:16, that same idea can stack the pursuer above on a fire escape and the runner below in the street, or stage both on a diagonal staircase. The action becomes native to the canvas instead of surviving a crop by accident.
Use the Seedance 2.5 video generator to select the vertical ratio at the generation stage. Do not rely on a later crop to rescue a composition whose important action begins outside the center.
Block Characters for a 9:16 Composition
Give each character a vertical lane and a depth position. One can occupy the upper third while another enters through the lower third; a foreground shoulder can frame a full-body figure deeper in the shot. Avoid placing both faces at opposite horizontal edges.
For one character, decide where the face begins and ends. A waist-up performance can move from lower-center to upper-center during a rise or push-in. A full-body action needs space above the head and below the feet so the model does not repeatedly crop limbs during movement.
When two characters interact, use overlap and depth rather than maximum separation. Keep the speaking face clear, make eyelines plausible, and give the responding character a readable silhouette without requiring the camera to swing across the entire width.
Keep Faces, Hands, and Action Inside Safe Zones
Platform interfaces can cover the top and bottom of a vertical video with captions, account controls, descriptions, or calls to action. Keep critical information away from those edges even before final platform-specific overlays are added.
Use a practical staging check:
- Keep the primary face near the central vertical band.
- Keep hand-held props inside the frame during the full action, not only at the start.
- Leave breathing room above heads and below landing feet.
- Avoid putting a reveal, subtitle-dependent object, or final expression at the extreme bottom.
- Keep background landmarks strong enough to survive phone-size playback.
Safe zones are not a universal pixel template; platform interfaces change. The principle is to protect the story from likely overlays and edge crops.
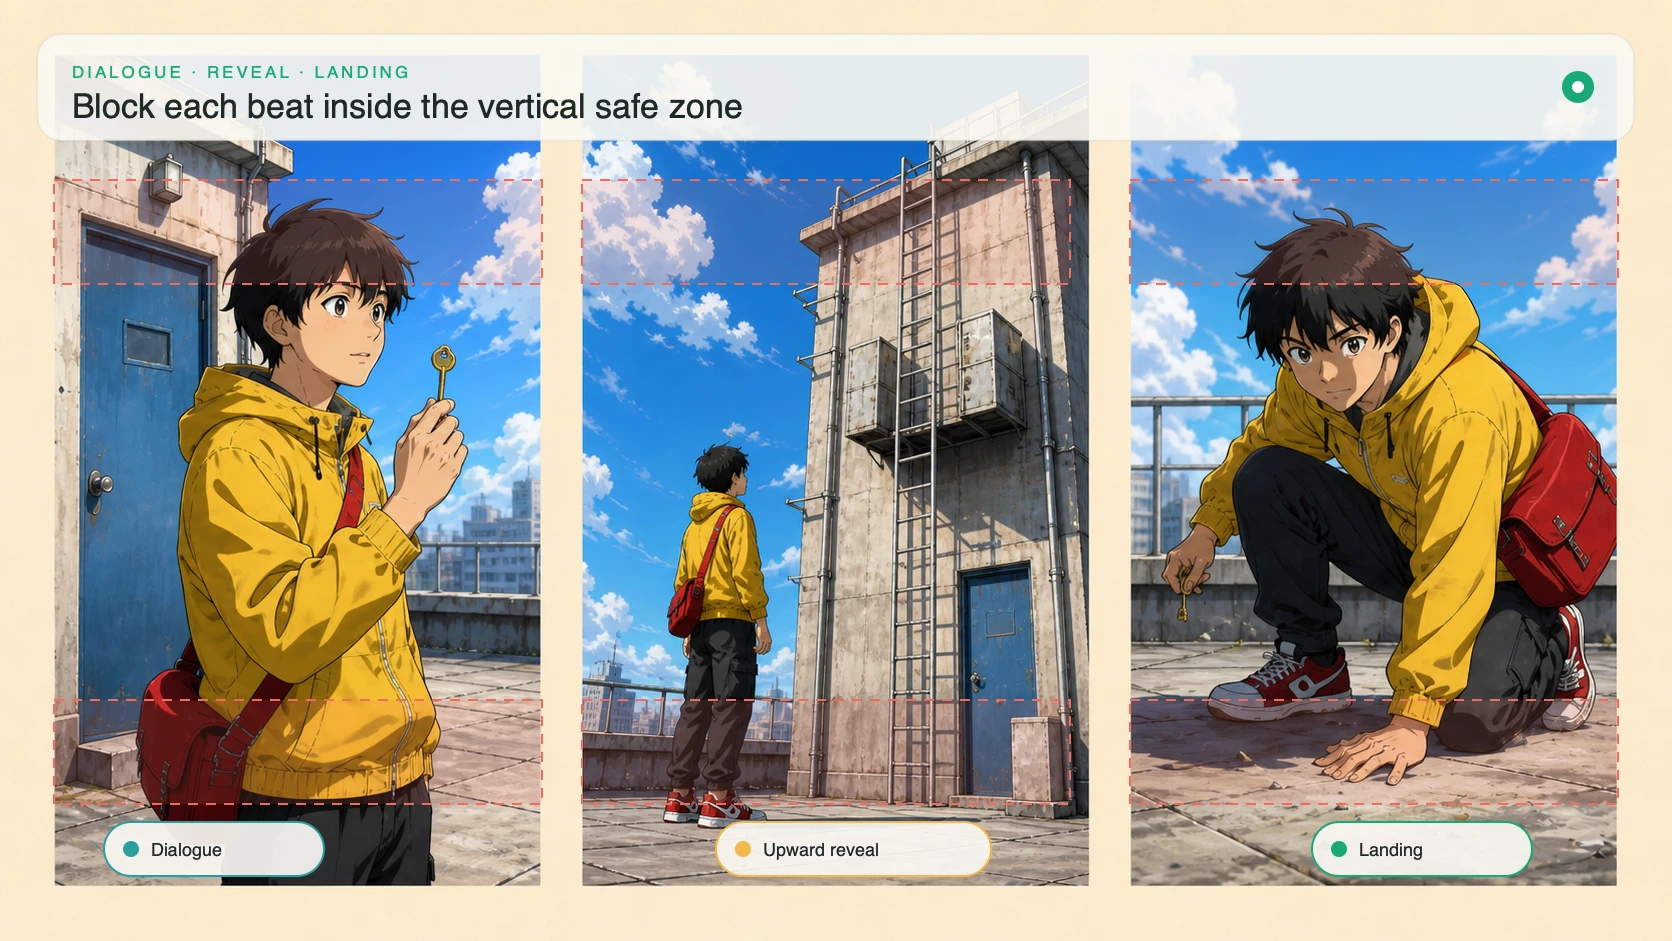
Choose Motion and Camera Moves for Vertical Space
Vertical space favors rising, falling, approaching, and depth-based motion. An elevator reveal, jump between levels, object dropping into frame, character standing from a crouch, or push toward a face can use the full canvas.
Give the camera one job:
- Tilt upward to reveal height.
- Track vertically with a jump or fall.
- Push in along depth while keeping the face centered.
- Hold steady while the character crosses from the lower to upper third.
Avoid fast horizontal orbits that repeatedly lose the subject at the sides. If the environment must be revealed horizontally, use a slower reframe and keep a central anchor visible throughout.
Describe secondary motion that supports the vertical direction: coat tails pulled downward during a rise, dust falling after impact, rain traveling through a deep frame, or signs passing behind a moving character. Supporting motion should clarify speed and gravity rather than fill every corner.
Plan a Short Hook, Escalation, and Ending
A vertical short needs a visible change immediately, but the first moment still has to be understandable. Start with a question already inside the frame: a hand reaching from below, a warning light above the character, or a courier hanging from a ledge with one strap slipping.
For a 15-second scene, use three beats:
| Time | Beat | Vertical staging |
|---|---|---|
| 0-4s | Hook | Subject and immediate risk centered |
| 4-11s | Escalation | Movement travels through vertical depth or height |
| 11-15s | Ending | Camera settles on a clear expression or changed state |
For 30 seconds, add one complication and one decision, not a second unrelated story. The ending should stop on a composition that can loop, cut cleanly, or lead into the next shot.
Generate Audio for Phone Playback
Phone speakers reduce low-frequency detail and compete with noisy viewing environments. Put the most important information in a clear voice, a distinct midrange effect, or a recognizable rhythmic change rather than relying only on deep ambience.
Write audio around visible beats: one alert at the hook, a rising wind layer during the vertical move, a landing impact at contact, and a short line after the character becomes still. Leave enough space for captions if dialogue is essential.
Do not fill every second. A brief drop in sound before a landing or reveal can create contrast that remains readable on a small speaker. Review once on headphones and once through the phone speaker before deciding the mix works.
Review the Clip as a Short, Reel, or TikTok
Watch the result at phone size, not only in a large desktop player. The existing Seedance 2.5 vertical scene test provides one piece of evidence about model behavior; your production review still needs to test the specific clip and destination.
Check five things:
- First-frame comprehension: can a viewer identify the subject and problem without context?
- Center retention: do face, hands, and important props stay visible during movement?
- Motion readability: does the camera reinforce the vertical action instead of fighting it?
- Ending value: is the final state clear enough to cut, loop, or continue?
- Audio resilience: do dialogue and key effects survive phone playback?
If the core action leaves the frame, revise staging or camera direction and regenerate. If the action works but the platform crop or caption placement is the only issue, preserve the clip and solve that in editing. The useful result is a shot designed for vertical viewing, not merely delivered in a vertical file.
This post first appeared on the MkAnime blog. AI assistance was used to help draft and organize the article; the steps and product behavior described were checked against the live product.

